
You must have seen the videos where the house is lit up in beautiful red and pink lights for Valentine’s Day, then switched to red and green lights for Christmas, and then back to plain yellow or white for a random Friday. You’re sold on this idea, right?
But still, there is one question that keeps popping up in everyone’s mind before installing those gorgeous lights, and we think it’s quite a fair one.
“How long does LED light installation take? Will the crew crawl around my roof for 2-3 days?”
Well, not even close. A professional crew works through the project in fully planned stages. Want to know how it works and what the permanent lighting installation process is?
Let’s walk through the process and find out some interesting details about Trimlight installation time.
First Things First – What is the Exact Trimlight Installation Time?
Let’s discuss the professional light installation timeline before we move on to the process. Actually, there is not one specific installation time for every home.
Smaller homes with simple styles usually take a couple of hours. But larger homes with complicated styles like multiple rooflines, peaks, and corners often take more time.
Several important things affect the timeline.
- Size of your home
- Number of rooflines
- Complexity of the architecture
- Amount of lighting being installed
- Number of zones
- Accessibility of the installation areas
- Electrical setup
- Weather conditions
- Custom lighting requirements
Depending on the size and project, it may take a few days to even weeks. So, it’s not possible to mention the exact timeline for installation. However, a professional crew can handle things more efficiently and safely than a non-professional one.
What to Expect Trimlight Install Day – Steps and Process
Let’s go through this the way it actually happens, step by step, instead of throwing a bunch of marketing fluff at you.
Step 1 – The Initial Home Survey
Before your crew starts installation, there needs to be a perfect plan.
And that’s where the property survey comes in.
A professional crew comes and looks at your home’s exterior and identifies all the areas where the system will go. Now this may include the following:
- Rooflines
- Gables
- Peaks
- Eaves
- Garage areas
- Architectural features
- Corners
- Entryways
- Other areas you want illuminated
The crew takes measurements accurately so they can plan the installation perfectly.
Remember, this short survey takes 30-50 minutes. This helps with fast installation.
Step 2 – Choose the Lighting Design
Once your property is being evaluated, it’s time to decide what lighting design you want.
That’s where things get fun & interesting.
Some homeowners want a clean and simple design, while others want to highlight every inch of their home, which includes the garage, entryways, hallways, and other architectural details.
On the other hand, you can even think about how you want the lights to work throughout the year. For example, you can choose from different lighting options based on the nature of your occasion. LED lights may light up your house in different colors for several occasions such as:
- Christmas
- Halloween
- Valentine’s Day
- Independence Day
- Birthdays
- Game days
- Parties
- Weddings
- Neighborhood events
- Everyday accent lighting
This means your lighting system can easily adapt to different occasions and moods.
Step 3 – Prepare the Installation Area
We have come to the part where homeowners usually picture things when they hear the word “installation.”
They instantly think about long wires, ladders, tools, technicians, and lights.
However, preparation comes before the installation.
Now, depending on your home, the preparation may involve the following:
- Checking installation surfaces
- Preparing mounting areas
- Organizing materials
- Confirming measurements
- Planning cable routes
- Identifying connection points
- Preparing the required equipment
To be honest, it’s a bit of a hectic process. So, we believe choosing professional installation is probably a good idea here.
Step 4 – Install the Trimlight System
That’s the main event.
Your crew starts installing lights along the planned rooflines and architectural areas.
This installation may focus on keeping everything
- Straight
- Secure
- Consistent
- Neat
- Professionally positioned
The goal is not just for the lights to work but also to look nice when they are turned off.
Step 5 – Connect the Lighting System
Once the crew installs all the lights, it’s time to connect different sections to work together.
The connections are checked.
The system is powered.
And then comes one of the most important parts: testing.
After all, nobody wants to discover that one section of their lights is not working after the crew has already left.
Step 6 – Let’s Test Everything
This stage includes quality testing.
The installer checks that all the lights are working fine and may check the following:
- Individual sections
- Light placement
- Connections
- Color consistency
- Power
- Control functionality
- Overall appearance
If something is not operating well and needs some adjustment, they do it on the spot.
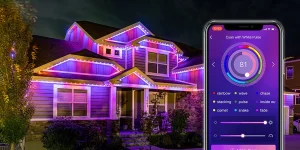
Step 7—Set up the TrimLight app.
We have come to the part where a permanent LED lighting system actually gets convenient.
The app.
Instead of climbing ladders every month to change lights, you can simply control everything from your phone.
Depending on the setup, you can customize things such as
- Colors
- Patterns
- Lighting effects
- Schedules
- Brightness
- Special occasions
- Seasonal displays
Whether it’s Christmas, Valentine’s Day, Memorial Day, or any other holiday, you can easily control and change the pattern using the Trimlight app.
Will Trimlight Installation Disrupt Your Whole Week?
No. Many people don’t consider Trimlight setup just because they believe that the installers may disrupt their whole week and affect their lives—which is definitely not true.
Although the exact timeline may depend on the project’s complexity, a professional crew handles things smartly and on time.
This means you don’t have to put your entire life on pause just because of installation.
What Does Installation Day Feel Like?
Here’s what you can expect on the day of installation:
- Morning: Getting Started
The crew arrives, reviews the plan, and prepares everything for installation.
- Midday: Installation
The team installs the Trimlight system across your planned areas.
- Later: Testing
The lights are connected, tested, and checked to ensure everything works properly.
- Finish: App Setup
Your app is connected, settings are configured, and you’re shown how everything works.
Final Thoughts – Trimlight Installation Dallas
If you’ve been putting off permanent lighting because you’re worried about how long installation will take, don’t let the timeline scare you away.
The best way to know what your specific project will require is to have your home evaluated.
Trimlight DFW can help you understand the installation process, plan the right lighting design, and create a system that fits your home. So, are you ready to make your home shine this year? If yes, let’s get connected with the trim light experts in Dallas and make your home look amazing for years to come.