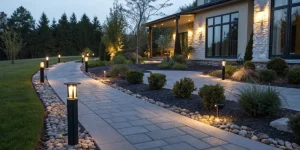

Gazebo lights not only enhance the aesthetics of your outdoor space but also provide functional illumination for evening gatherings and activities. Installing gazebo lights can seem like a daunting task, but with the right guidance, it can be a straightforward and rewarding project.
In this comprehensive step-by-step guide, we will walk you through the process of installing gazebo lights Dallas, from planning and preparation to wiring and mounting, ensuring a successful and hassle-free installation that will elevate the charm and functionality of your outdoor oasis.
Step 1: Gather Your Materials and Tools
Before you begin the installation process, it’s essential to gather all the necessary materials and tools. Start by selecting the type of gazebo lighting Dallas you want to install, whether it’s string lights, lanterns, spotlights, or a combination of different styles.
Next, gather outdoor-rated extension cords (if needed), mounting hardware appropriate for your gazebo structure, wire strippers, wire connectors, electrical tape, a ladder, and a power source, such as an electrical outlet or a battery pack.
Step 2: Plan Your Lighting Layout
Take some time to plan the layout of your gazebo lights, considering factors such as the size and shape of your gazebo, the intended use of the space, and your aesthetic preferences.
Sketch out a rough layout on paper, indicating where you want to place the lights and how you want to string or hang them. Consider whether you want to outline the perimeter of the gazebo, illuminate specific features or focal points, or create a canopy of lights overhead.
Step 3: Measure and Mark the Placement
Once you have finalized your lighting layout, use a tape measure and pencil to mark the placement of the lights on your gazebo. Measure the distance between each light and ensure they are evenly spaced for uniform illumination. Take into account any corners, edges, or curves in the gazebo structure, as well as any obstacles or architectural features that may affect the placement of the lights.
Step 4: Prepare the Power Source
Depending on the type of gazebo lights you have chosen and the location of your gazebo, you may need to make arrangements for the power source. If your gazebo is located near an electrical outlet, you can simply plug in the lights using outdoor-rated extension cords. If not, you may need to install a weatherproof outlet or use battery-powered or solar-powered lights that do not require a direct power source.
Step 5: Install Mounting Hardware
Before you can install the lights, you may need to install mounting hardware to secure them to the gazebo structure. Depending on the type of lights you have chosen and the material of your gazebo, this may involve screwing in hooks or brackets, attaching clips or clamps, or using adhesive strips or hooks. Make sure the mounting hardware is securely attached and can support the weight of the lights.
Step 6: Connect the Lights
Once the mounting hardware is in place, it’s time to connect the lights. If your gazebo lights come with pre-attached wiring, carefully thread the wires through the mounting hardware and connect them to the power source. Use wire strippers to remove the insulation from the ends of the wires and wire connectors to secure the connections. Wrap electrical tape around the connectors for added protection against moisture and weather elements.
Step 7: Test the Lights
Before securing the lights in their final position, it’s essential to test them to ensure they are working correctly. Plug in the power source or activate the batteries/solar panels and check that each light is illuminated. This will allow you to identify any issues or defects before completing the installation and make any necessary adjustments or repairs.
Step 8: Secure the Lights
Once you have confirmed that the lights are working properly, secure them in their final position on the gazebo. Use the mounting hardware to attach the lights to the gazebo structure, following the layout plan you created earlier. Make sure the lights are positioned securely and evenly spaced for optimal illumination. Double-check the connections and tighten any screws or clips as needed.
Step 9: Conceal Excess Wiring
If there are any excess wiring or extension cords, carefully tuck them away or secure them to the gazebo structure to prevent tripping hazards and maintain a neat appearance. Use cable ties or clips to bundle and organize the wiring, ensuring it is safely out of the way and protected from damage.
Step 10: Enjoy Your Newly Illuminated Gazebo:
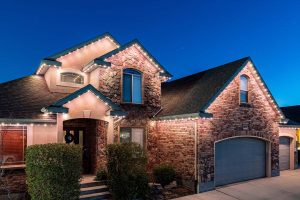
With the installation complete, step back and admire your handiwork. Turn on the lights and bask in the warm glow of your beautifully illuminated gazebo. Invite friends and family to enjoy evenings outdoors, knowing that you’ve created a welcoming and inviting space for relaxation, entertainment, and enjoyment. For festive occasions, you can also consider adding permanent christmas lights near me to further enhance the ambiance of your outdoor space during the holiday season.
Conclusion:
Installing outdoor gazebo lights Dallas is a rewarding DIY project that can transform your outdoor space and enhance its functionality and aesthetics.
By following this comprehensive step-by-step guide, you can successfully install gazebo lights with confidence, creating a cozy and inviting ambiance for evenings spent outdoors. So, roll up your sleeves, gather your tools, and get ready to illuminate your gazebo in style, turning it into a captivating focal point of your outdoor oasis.